Scrambled eggs seem simple, but anyone who’s suffered through a rubbery or watery texture knows that achieving a fluffy, melt-in-your-mouth result takes more effort than you’d expect. Scrambled eggs might be one of the easiest dishes, and also one that everyone seems to get wrong. So, let’s learn how to make scrambled eggs properly.
Why Scrambled Eggs Turn Creamy or Rubbery
If you’re a bit nerdy like me and love geeking out over food science, you’ll want to stick around for this section on the perfect scrambled eggs. Otherwise, feel free to skip it. Here’s the deal: egg whites are mostly protein and water, while the yolks are full of fat and flavor.
When you heat them, the proteins unfold and bond, giving your eggs structure. But crank the heat too high, and the proteins tighten too much, squeezing out moisture and leaving you with that dreaded rubbery texture. That’s why cooking slowly over low heat is the way to go.
One more tip, adding salt while you whisk actually helps retain moisture and gives you tender, soft curds. For best results, use about 1/8 teaspoon of fine sea salt per large egg.
The Basics You’ll Need
A 7-inch nonstick skillet is perfect for two eggs, and an 8-inch pan works well for four. Personally, I like to skip the nonstick and go for a well-seasoned cast-iron skillet. Trust me, ditch your nonstick and try cast iron. You’ll notice a huge difference in flavor. Pair your pan with a heatproof silicone spatula. It lets you easily sweep and fold the eggs without scratching the surface.
Always use fresh eggs. Grocery store eggs work fine, but if you can get them from a local farmer, you’ll see a huge difference. The color is richer, the taste is brighter, and it really makes your scrambled eggs stand out.
For fat, you can use either butter or olive oil, it’s really up to personal preference. Some people avoid dairy and prefer oil. If you’re using butter, wait until it foams over low heat before adding the eggs. That foaming means the water in the butter is evaporating, which is perfect for cooking. If it just melts without foaming, the eggs end up absorbing it instead of cooking in it. For oil, add it when it just starts to shimmer.
Step-by-Step: How to Make Scrambled Eggs
Crack cleanly: Use a flat surface like your countertop, not the bowl’s rim, to avoid shell fragments. If you do get shell in the bowl, use a larger eggshell piece to scoop it out, the sharp edge cuts through the egg white more effectively than fingers.
Whisk vigorously: Beat eggs until completely blended and uniformly yellow with no streaks. Whisk for a full minute to incorporate air. The top should look foamy — those air pockets are crucial for fluffiness. Use a fork for better control when whisking in the pan.
Salt early: Add salt during whisking to ensure even distribution. Let the mixture rest while you preheat the pan.
Preheat properly: Heat your skillet over low heat until butter foams. Some advanced techniques suggest testing pan temperature by heating a tablespoon of water until it evaporates.
Add eggs off-heat: Remove the pan from heat, pour in eggs, then return to heat. This prevents shocking the proteins and gives you more temperature control.
The whisk-and-rest method: For ultra-creamy results, use Sunny Anderson’s professional technique. Pour eggs into the pan and let them sit a few seconds. When they begin setting on the bottom, gently whisk, then rest again. Repeat this process—whisk, rest, whisk, rest—until about 50% set. This creates tender, medium-sized curds.
The constant fold method: For fluffier eggs, use a silicone spatula to continuously fold cooked egg from the edges into the center, allowing uncooked egg to flow onto the hot surface. Rotate the pan as you work. After about 30 seconds, when eggs are mostly set, remove from heat, the residual pan heat will finish cooking them.
The low-and-slow stir: For classic creamy eggs, stir constantly over medium-low heat in small circles until tiny curds form, then switch to long sweeps across the pan.
Remove eggs when they’re slightly wet and 75-90% done. They’ll continue cooking off-heat. Overcooked eggs become dry and crumbly. If adding cheese, incorporate it when eggs are 75% cooked so it melts throughout.
Common Mistakes and How to Avoid Them
Mistake #1: High heat
Cooking over high heat makes eggs dense, dry, and tough. It wrings moisture out like a sponge. Always use low to medium-low heat.
Mistake #2: Overcooking
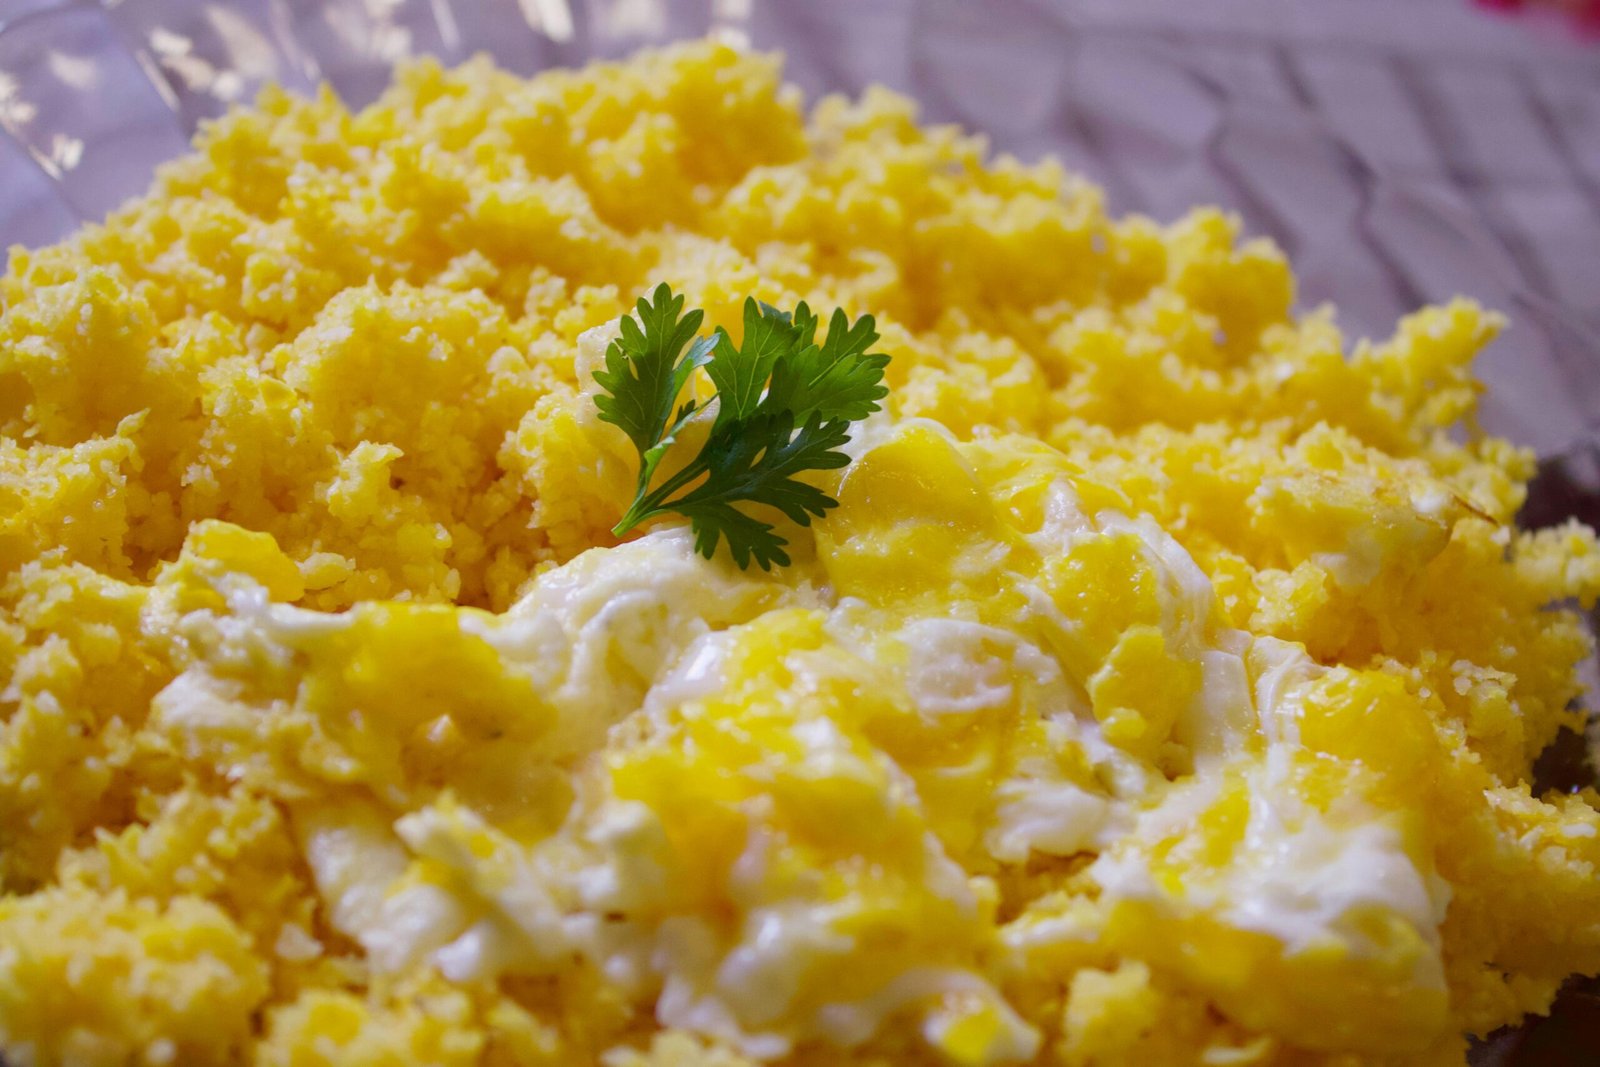
Perfect scrambled eggs should be fluffy, moist, tender, custardy, and bright yellow. Overcooked eggs become rubbery, chewy, or crumbly with an unappealing gray or brown tinge.
Mistake #3: Stirring too vigorously
Aggressive stirring breaks curds into tiny pieces and releases moisture. Be gentle, fold rather than stir.
Mistake #4: Wrong pan size
Too large a pan spreads eggs too thin, causing them to cook unevenly and dry out. Follow the guidelines: 7-inch pan for 2 eggs, 8-inch for 4 eggs.
Mistake #5: Adding milk indiscriminately
While some swear by milk, it can dilute flavor. If you want creamier eggs, use small amounts of richer dairy like cream or sour cream.
Restaurant-Style Scrambled Egg Techniques
J. Kenji López-Alt’s 2-Minute Miracle
The New York Times cooking guru developed a method that produces cloud-like eggs in under two minutes. The secret is the starch slurry. Whisk together potato, tapioca, or corn starch with water, then add cold cubed butter, eggs, and salt. The slurry prevents proteins from linking too tightly and binds moisture, creating tender eggs even if slightly overcooked.
Cook a tablespoon of water in the pan until only a few drops remain, melt butter until foamy, then add the egg mixture and fold for just 1-2 minutes. The result is astonishingly light eggs with little time investment.
The Extra Yolk Method
Adding two additional yolks per four whole eggs enriches flavor and helps prevent overcooking. The extra fat and emulsifiers raise the coagulation temperature, giving you a wider margin for error. For ultimate richness, try scramble made entirely with extra yolks.
French-Style Ultra-Creamy Eggs
The classic French preparation requires at least 15 minutes of constant stirring over low heat. While time-consuming, the process is meditative and produces irresistibly creamy curds. For a modern twist, use a double-boiler setup or cook in a saucepan over another burner set to low.